REFRESHING A SPORTING CARBINE MADE BY S. LAGAUCHE AT LIEGE
Our Webmaster brought me a nice Liège- made carbine that needs to be refreshed. At first glance the weapon looks good, however a little dirty, and also covered with a rather thick layer of unidentified varnish or paint. For the rest, it looks complete and functional.
This weapon is quite mysterious to me, as further explained.
IDENTIFICATION
- Single shot sporting carbine in the 6 mm caliber
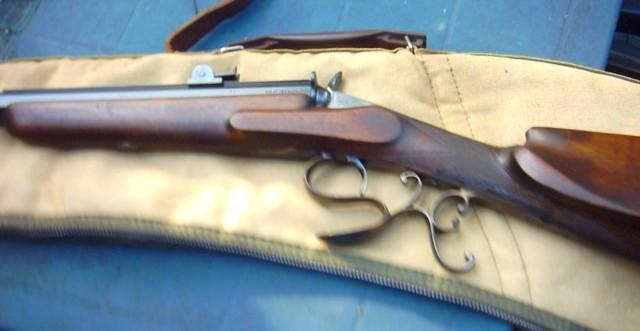
- Heavy octagonal barrel, featuring a sliding rear sight and an adjustable front sight. The rear sight graduations allow up to 1,600 m. Rifled 5 clockwise
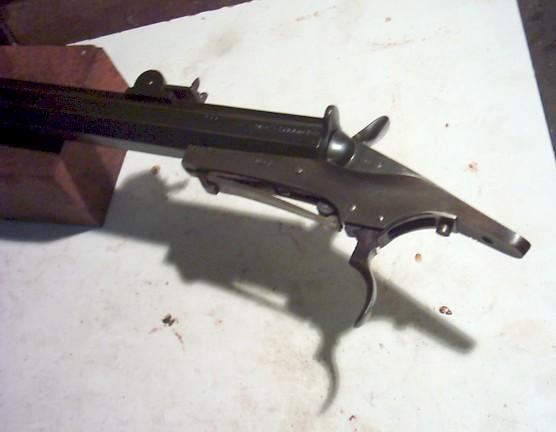
- Classical Warnant-type lockwork, including a very heavy hammer
- No breech nor seal
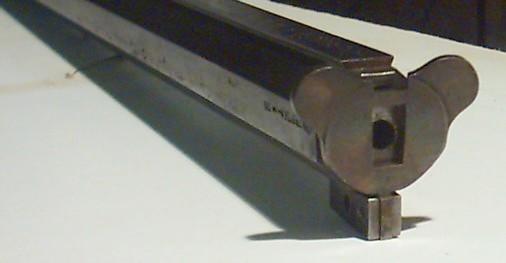
- Very large Mickey Mouse-type extractor, featuring a central aperture allowing loading the cartridges through the extractor
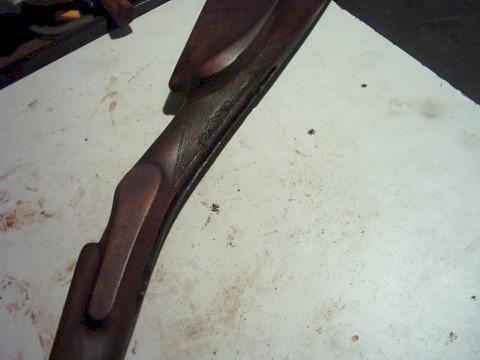
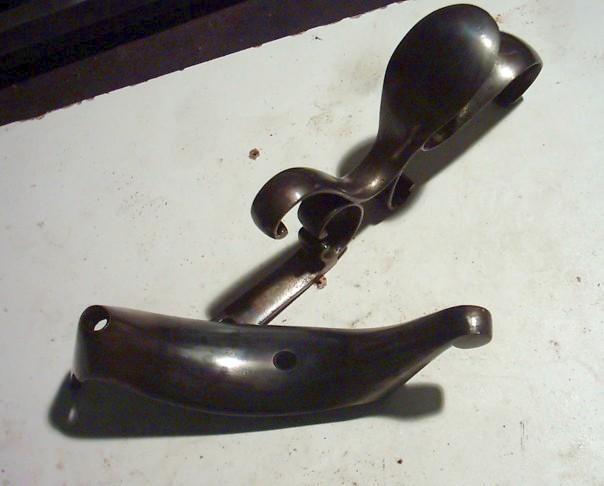
- Nice stock of selected walnut, featuring a cheek piece and an enveloping buttplate that resembles that of the Swiss rifles. The stock also has the two classic Warnant flat sides on both sides of the lock
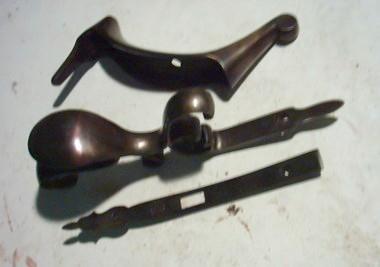
- Large curly trigger guard that also acts as a bench rest.
Markings:
- On the lockplate, the "Peron" (step) and A under star, n# 866
- Left side of hammer: Peron and A under star
- Barrel: top and left bottom flats: S. LAGAUCHE A LIEGE; on the left flat: ELG* in crowned oval, Peron, A under star and R under crown - mention FL 6 m.C, n° 866
- Bottom flat: MARIETTE and initials JB, IBL and figure 9.
So this carbine has undoubtedly been manufactured by S. Lagauche, who seems to have used a barrel produced by Mariette (?)
The mystery starts with the mention FL 6m.C, which at first glance is the current Flobert marking. Since the Flobert ammunition has only a primer and is designed for smoothbore gallery guns, some questions arise about the reason of such a marking on a weapon that has a rear sight for long distance aiming, a barrel heavy enough to absorb any recoil, and a rifled bore. Moreover, I am much surprised to state that the chamber accepts the .22 Long Rifle cartridge, and maybe the .22 Magnum.
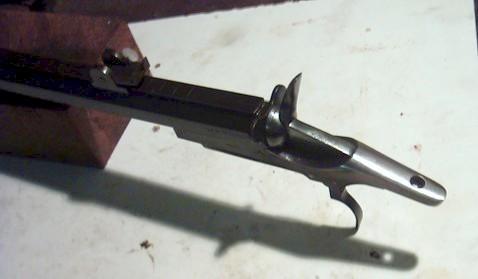
Another curious fact is that the weapon has no breechblock.
At the rear of the barrel, between the hammer and the chamber, there is a Mickey Mouse shaped plate, which articulates on a transversal axis and has a hole in the middle.
This plate is the extractor; it holds the cartridge in place and allows extracting the empty shell after shooting. So the heavy hammer itself acts as a breechblock and seals the breech at the moment it strikes the cartridge, like on small Cyclist pistols.
The Warnant lock, which is very simple in its conception, can be coupled to different breech systems. It is often seen coupled to rolling block or trapdoor systems, but I never had seen any like this before.
CLOSE EXAMINATION AND DIAGNOSTICS
I have no problem disassembling the gun. All screws are screwed all the way in, but come easily loose. The inner parts are clean and dry.
However in good general condition, with a good working lock mechanism, the carbine shows the following flaws:
- The whole gun is covered with a thick layer of varnish, probably meant to protect it against rust and dirt. It's awful, but it gives an efficient protection. I'll have to remove that varnish.
- The barrel shows little traces of pitting here and there, and needs to be reblued.
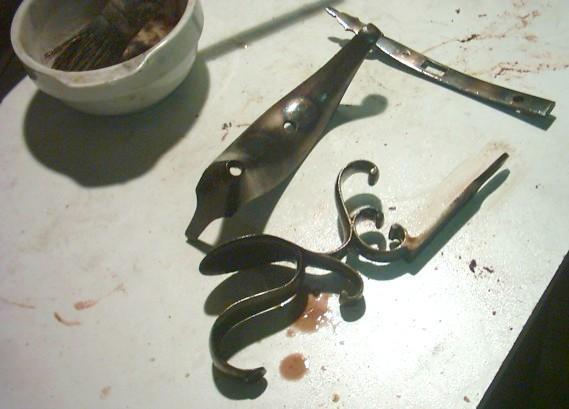
- The scrolled trigger guard and the butt plate were originally case hardened but have lost their colors; someone attempted to imitate the original case hardening colors by burning the parts with a torch....It was not well done, as anybody can see it right from the start.
- The lockblock, the hammer and the trigger look like they have never been finished in any way but left white polished. They might have been "grey tempered" though.
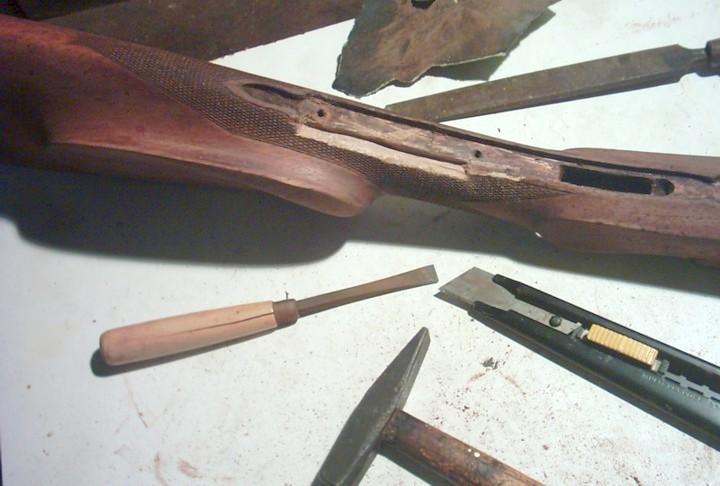
- There are some light stains and dents on the wood, and also quite a long chip missing next to the triggerguard, right in the chequered area.
- Three or four modern screws should be replaced by genuine ones.
There is more to do than one could have thought, but I trust I can give that nice piece a better look again.
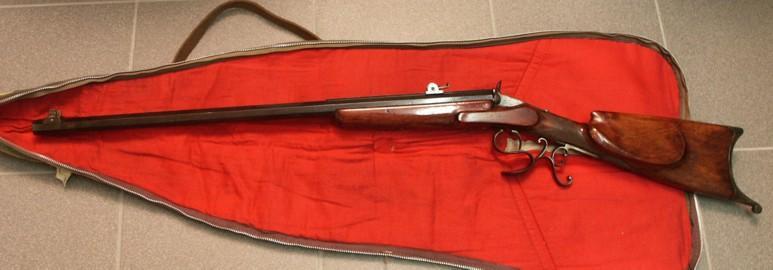

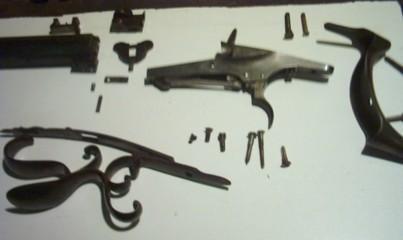
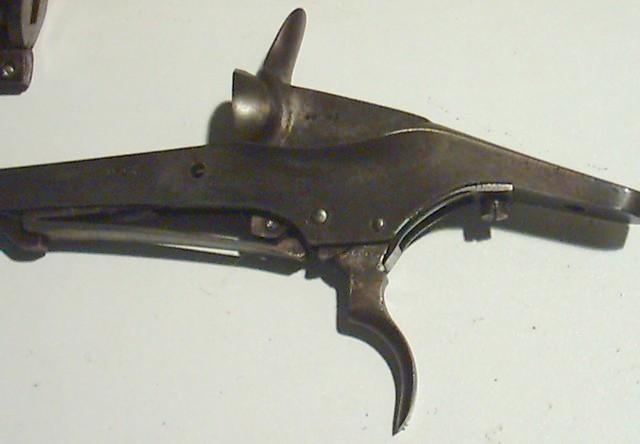
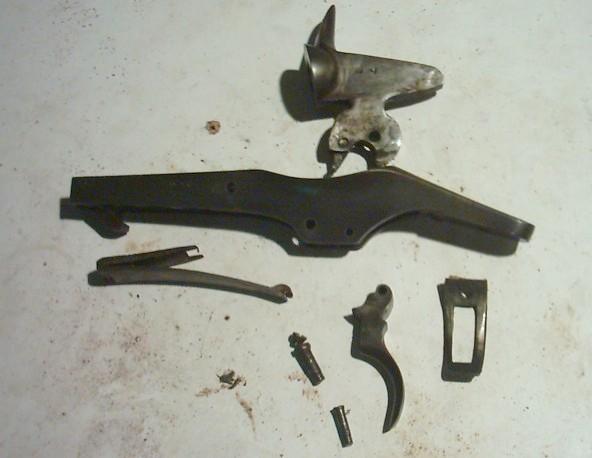
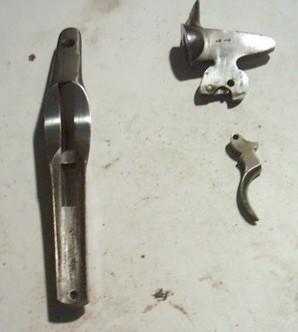
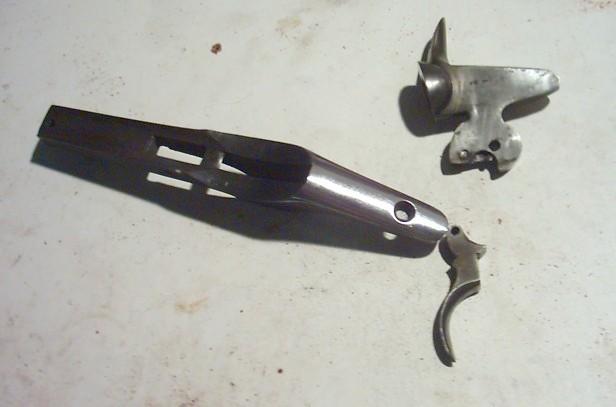
Pictures show the carbine as it was when I received it, and disassembled. The characteristic Warnant lockwork has been left complete and will be disassembled later. Remarkable is the ingenious construction around a central main spring, that allows mounting the Warnant lockwork on nearly any rifle model, and its concept that allows combination with various breechlock systems.
The trigger return spring is attached at the rear of the lock by a screw. It is a rectangular curvy spring, with a rectangular "window" cut in it to allow the massive hammer tail to pass through when the gun is at full cock.
OPERATIONS TO BE DONE
- Removing all the varnish off the whole gun
- Removing dents in the wood with steam and fine sanding
- Inlet in the handle and rechequering
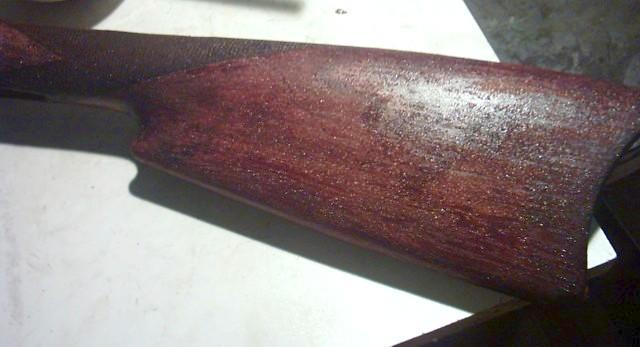
- Darkening the wood and linseed oil polishing (the owner doesn't like varnished stocks)
- Polishing of the lockplate, the hammer and the trigger
- Charcoal or fire blueing of the hammer and the trigger
- Restoration of the case-hardening colorations on the trigger guard and the butt plate
- Light polish and cold reblueing on the barrel
- Replacement of the modern screws by genuine gunmaker's ones
REMOVING THE VARNISH
In a supermarket I found a good jelly paint and varnish remover that affects only varnishes and paints, without any danger for glues, wood or metallic parts. I guess
that similar products are available everywhere in the world.
I start with the stock, on which I put a good layer of jelly using an old painter's brush. Then I do the same on the barrel, the trigger guard and the butt plate.
I leave the parts alone for about 20 minutes to allow the remover to do its work.
Myriads of small blisters appear on the surface of the parts, indicating that the jelly is softening and destroying the varnish. After about 20 minutes, I can wipe out all the remains of the old varnish using a simple dry cloth.
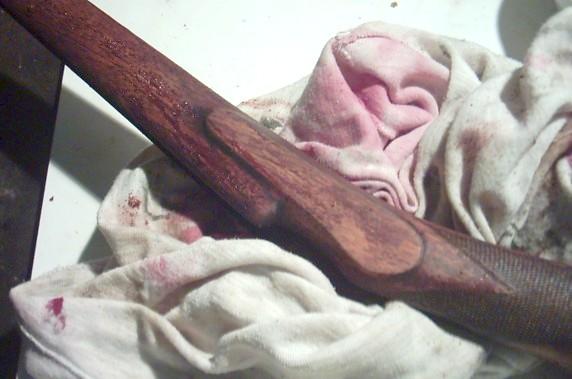
The stock needs a second treatment, but not the metallic parts. The varnish has been completely removed, and all the parts are perfectly intact. No hard work, no polishing, just a lay of jelly for a perfect result. Why should I look for any other system to remove old varnish?
After the second treatment, I polish the wood lightly with fine sandpaper to eliminate the last remains of varnish.
INLETTING THE STOCK - Phase 1
An inlet is a piece of new or old wood that is inserted into a stock (or a table, a chair or a statue, etc) to replace a damaged or missing area. In two words, the wood is cut around the damaged area, so that it can be removed, and a new piece of wood of the same specie is put in place, respecting as much as possible the wood lines and designs so that the inlet would be as less visible as possible.
Very easy to explain, but quite difficult to achieve.
In this case, a portion of wood of the chequered handle has been broken and lost. The area is not easy to work on.
Using a chisel, I cut carefully a rectangular section in the wood, as straight as possible and not too deep, in order to remove the whole damaged area. I try to make my cut as regular as possible using a file, a Stanley cutter and sandpaper. That kind of work is not easy to do.
Fortunately I've got on hand quite a lot of walnut; so I can choose one in which I cut a piece of wood of the right length, but rather thicker than the one I have removed, so that I can file it into the right shape once it has been inlet.
After having cut my block a little curvy in order to make it follow the general line of the stock, I glue it into place using a good white woodcraft glue. Then I allow a few hours to dry. I do not throw away the saw dust and little pieces of wood cut, because I will need them later to fill up the small gaps between my inlet and the stock.
DISASSEMBLING THE LOCKWORK
While my inlet is drying, I'm going to disassemble the lockwork and clean it.
It is worth to mention that this kind of lockwork features a main spring that is as strong as those on flintlock muskets, which renders disassembling uneasy and even dangerous.
Uneasy because of the strength of the spring, and dangerous since if it jumps into your face, the results could grant you nice nicknames like "Scarface" or "One-Eye Joe".
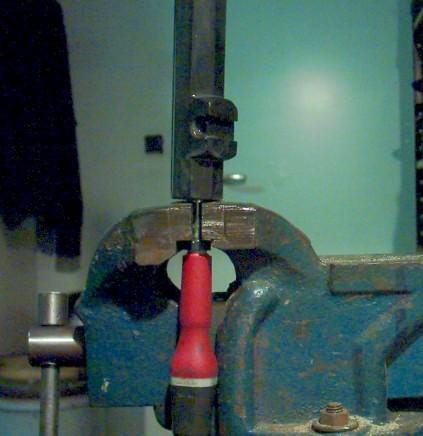
In order to avoid that kind of fun, I first bring the hammer at full cock, then I pince the whole thing into my vice
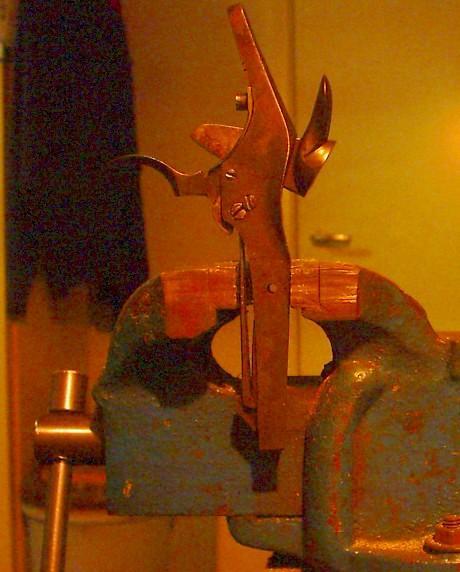
Then I screw off the trigger and its return spring, then the hammer axis (this one has a small counter screw that prevents it from unscrewing accidentally). Once the hammer is free, I can easily dissociate its chain from the spring fork and remove it.
Finally I loosen the vice gradually in order to liberate the spring, and the job is done.
Picture 20 shows the fully disassembled lockwork. Its simplicity and small number of parts are evident; this is a strong mechanism that is build for a long use.
POLISHING
Since the lock block is almost completely concealed into the wood when the gun is assembled, I just have to polish the upper part of it. As I have no idea of the original finish of that part (I thik it was white polished only), my best option is a mirror polish. As for the hammer and the trigger, I will polish them as well and then fireblue them. Even if the latter was not the original finish, these colors will harmonize with the blued barrel and the white polished lock.
Polishing is done by hand, using sanding papers of 600, 800 and 1000 grain, and finishing with very fine steelwool (1000). The job takes longer time but gives a nicer result than any machine polishing.
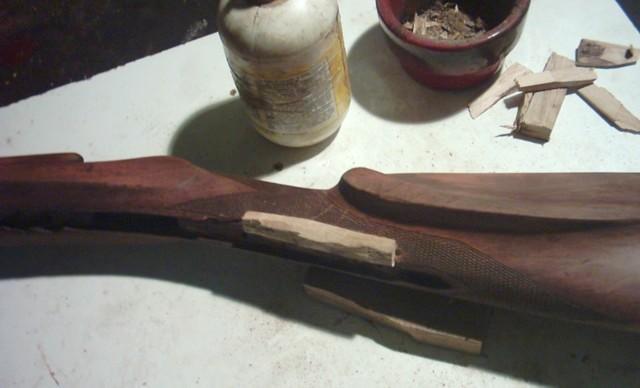
INLETTING THE STOCK - Phase 2
The glue has now dried and holds my inlet firmly in place. Normally I should secure it by one or two transversal wooden pins, but I don't think this is necessary to hold such a small piece, that does not have to stand any tractions nor pressures of any kind.
In order to finish the job, I need to integrate my inlet to the rest of the stock by filing it into the exact shape and dimensions, so that it would be as discrete as possible. Later I'll have to cut a new chequering on the inlet - or try to do so - to integrate it as good as possible.
Using a Stanley cutter, a light wood rasp, a file and sanding paper, I give my inlet the same curve as the rest of the stock, and I I file its surface rise with the rest of the wood. This has to be done carefully in order to avoid damaging the intact original chequering around the inlet.
During the operation, I also put the trigger guard frequently in place, in order to make sure that it can be assembled in place without forcing; otherwise the overpressure would break my inlet after some time.
Once the inlet integrated, I can clearly see the flaws: since I am just an amateur and did not use any special tools, the joint between the inlet and the stock is not perfect over the whole length and shows some small gaps.
That's why I did not get rid of the dust saw and the small wood chips I was talking about.
First I fill the largest gaps as much as possible with englued small chips.
Then I mix some glue with sawdust on a small plate. The "plastic wood" I obtain that way is much better than any available similar product, because those industrial repair kit have never the right color, and produce greasy stains on the surface of the wood. I fill all the gaps generously with my mixture, and then again I allow a few hours to dry and harden.
Once dry and hard, it will have to be sanded and checked for possible forgotten small gaps.
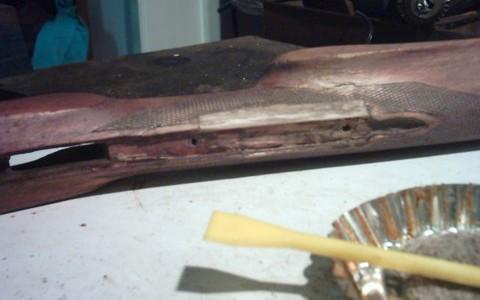
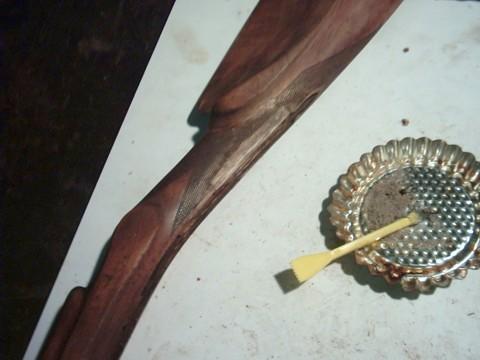
Pictures show the evolution of that second phase.
While the glue is hardening, I have the time to blue the hammer and the trigger and reassemble the lock mechanism.
FIREBLUEING OF THE HAMMER AND TRIGGER
I think I have described my own method in previous articles. The parts are polished as well as possible, then put on a thin iron plate that I heat on my small camping gas fire, until they come to the blue. Once there, I kill the fire and let everything cool down. While cooling, the parts should acquire the characteristic colors of the fireblueing.
I got however a surprise: while the trigger acquired the expected blue color, the hammer refuses obstinately to change. Whatever I try, it won't acquire anything else than a light gey-blue color that is anything but nice.
This happens sometimes, and I am still wondering why a steel part refuses to blue when it is heated, even if I increase the temperature. I just think - but I am not sure about it - that it might have been nickel-plated in the past, and that nickel plating, even when totally gone, still has an influence on the metal surface.

INLETTING THE STOCK - Phase 3, chequering repair
People, who say that stock chequerings are a matter of skilled workers, are totally right. I lack not only the proper tool, but the knowledge of its use as well; which means that the chequering I cut on my inlet using a pencil and a small chisel, is not very nice. I hope it will be well hidden in the rest of the wood once the job finished. The alternative would be to make a new inlet.
REASSEMBLING THE LOCK MECHANISM
This operation is the reverse of the disassembling. First I place the main spring home at the bottom of the lockblock, then I place it into my vice (pictures 33 to 36). The spring should be put exactly in place and well aligned.
Then I put the hammer in place and hook its T-chain into the spring fork prior to put its axis into place; then I screw the axis all the way in and lock it with the small counter screw.
Then I loosen my vice a little in order to allow some tension to prevent the T-chain to dissociate from the spring fork, and I reassemble the trigger and its axis. Last I reassemble the trigger return spring. God knows why someone placed a small cardboard piece between the spring and the frame; as it appears useless, I do not reuse it.
Once the lock mechanism reassembled, I check its working. It works perfectly, so that is another job done.
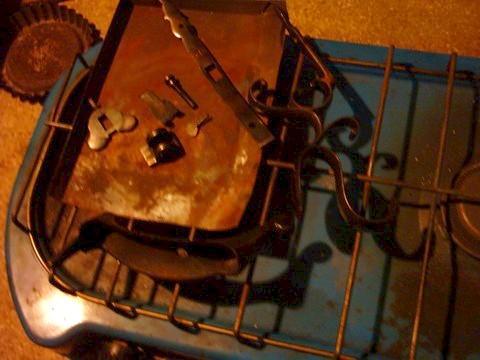
REFRESHING THE CASEHARDENING COLORATIONS
After a light polish, I put the butt plate and the triggerguard on my gasfire around the flame, so that the temperature will not be the same on all points of the parts. This treatment, if well done, creates beautiful case-hardening colors in the metal that are much more beautiful than what my predecessor achieved with his torch.
I also dismantle the rear sight (7 parts !!) and the extractor, and put them on an iron plate on the fire. Moving them a few times during the operation gives the same result.
COLD REBLUEING OF THE BARREL
As the barrel needs to be reblued, I have polished it lightly to remove the light digs and the formal blueing.
I can't however reblue it the usual way, since it is too long to fit in my oven. To obtain a good blueing, the temperature should be the same on any point of the piece to blue; though this barrel is too long for my own system. Since I can't find any saltpeter powder I could melt, I can only use cold blue liquor layers.
According to some people, this method is only valid for presentation pieces, as it is weak and tends to vanish rapidly on a weapon that is frequently used.
I don't agree totally with that statement. If the liquor is properly applied, one will get a nice deep blue, good covering and practically as good as the one obtained by heating. The weapon can really be used without risk of seeing the blue color vanish after the first manipulations.
Of course I can't give any specific brand in here; let's say I decide to use the worldwide famous American made liquor that can be found in any shop in the also worldwide famous little blue plastic flasks. If I was in France, I would use very good liquor, also contained in small blue plastic flasks, sold by the descendants of one of the most famous 19th century French gunsmiths whose first name was Casimir.
In order to make the work easier, I pince a screwdriver vertically in my vice, wrap it into a piece of cloth, and then I place the barrel vertically on it.
Then I need some trichloroethylene in a recipient (or any other degreaser), some liquor in a separate one, a bucket of clean cold water, three separate and clean sponges, some very fine steel wool and a few clean clothes.
Any grease or fat should be carefully avoided, for these would cause stains in the blueing.
Then I simply follow the instructions on the flask label:
With the first sponge drenched with trichlo, i first degrease the barrel, insisting in all small corners and holes in order to remove all grease and oil.
Then I use another sponge to rinse properly with clean water from the bucket, and then I wipe dry with a clean dry cloth.
Once the barrel cleaned, I drench the third sponge with liquor and I apply a first layer on the metal. It blues almost immediately. Then I press my sponge in order to exprime the excedental liquor, and I pass it a few times on the metal, in order to bring the liquor everywhere and to avoid "tears". The first layer is light blue and transparent.
Then I allow to dry for about 10 minutes. While drying, the metal acquires an ugly matt blue-grey color. Once dried, I wipe it again with a dry cloth to remove that matt excedentary layer, and I check the blue. Perfect: the first layer is light blue and transparent as it should be.
Now I do all above described operations again, taking care of holding the same sponges and clothes for the same phases to avoid any contamination. I need three thin layers to bring the barrel to the blue I like the most.
After the last drying, I drench the barrel with fine oil (any kind), and I rub it gently with the steel wool. Then I leave it oiled until the next day. It has acquired a very nice dark and uniform blue color, slightly lighter on the edge ("old looking", as I wanted it to be...) and well resistant.
People who intend to try this method for the first time should know that it is very easy but requires to be done exactly as described above, in order to avoid stains that would force them to do it all over again. The secret of a nice and resistant blue is to apply the liquor in THIN layers. 5 thin layers are better than 2 gross ones.
REASSEMBLING THE LOCK AND BARREL ON THE STOCK
Once the barrel finished, I reassemble the Mickey-Mouse extractor and its spring, then I mount the barrel on the lockblock, the sights on the barrel and the whole thing onto the stock.
MAKING NEW SCREWS
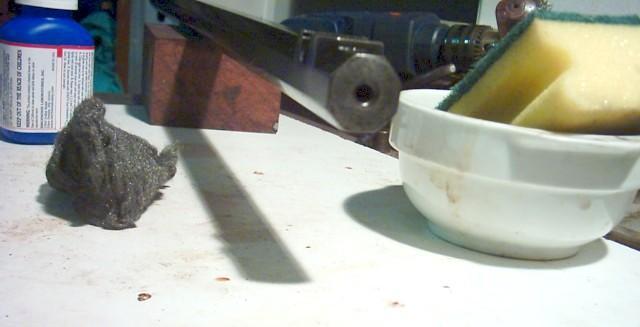
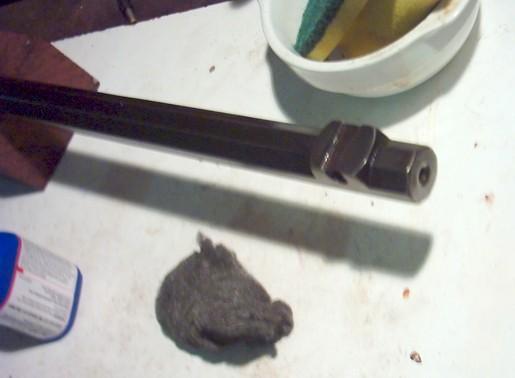
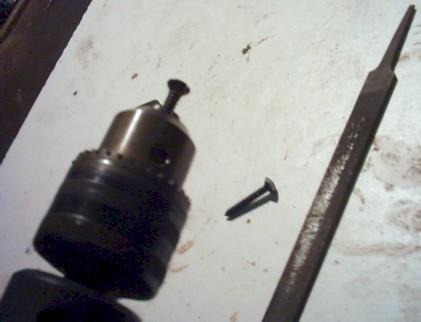
As told in the beginning of this article, some of the original screws have been replaced by aful modern ones. I got on hand some genuine gunmaker's stock screws, but not enough of the proper size. So I decide to reshape some of the pirate screws to a more acceptable look.
For once I will now use a modern tool, which is an electric drilling machine. I hold the machine horizontally in my vice, and then put the screws in the mandrel so that I can reshape the curve of the heads with a file
FINISH
Now the only thing I have to do is to reassemble the trigger guard and butt plate, then wipe the gun clean with a dry cloth before handing it back to its owner. Personally I would have preferred a varnished stock, but the owner prefers a satin polish with linseed oil. Matter of personal choice...
Marcel