7. REVOLVER "Lefaucheux"
REPAIRING A TRIPLE ACTION SECOND TYPE LEFAUCHEUX REVOLVER
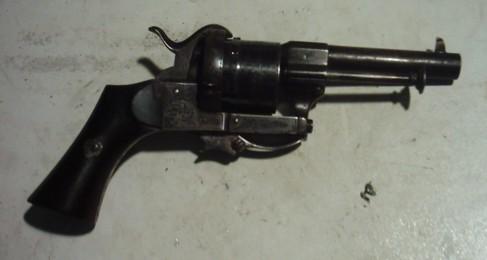
Our friend and workmate Philippe has handed me a very nice small pinfire triple action Lefaucheux revolver that doesn't work anymore and needs to be repaired.
IDENTIFICATION
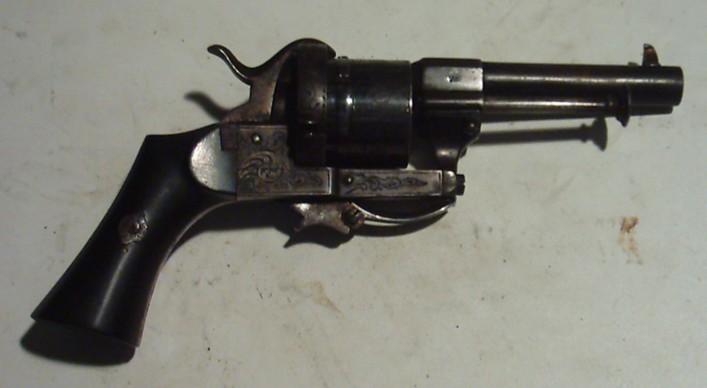
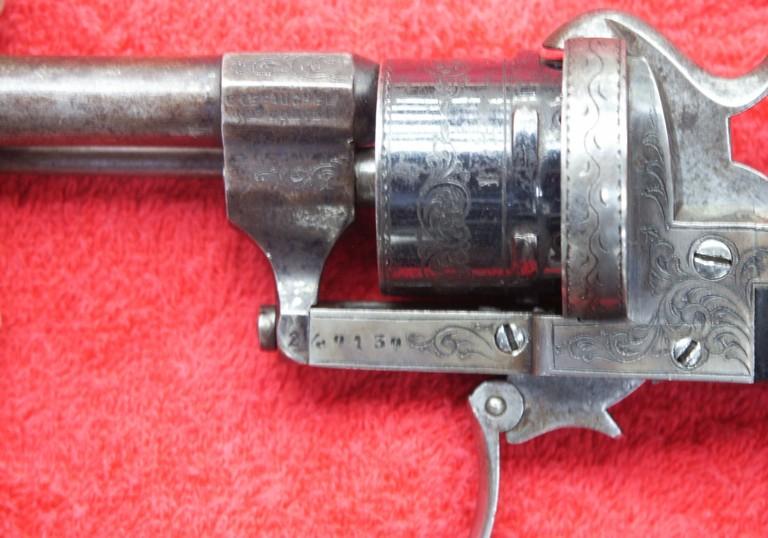
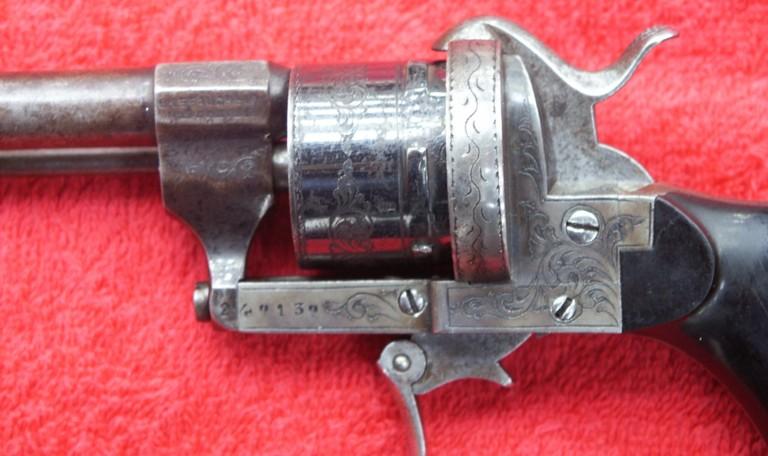
Luxury finished 7 mm caliber pinfire revolver
Second type with square butt and triple-action lock
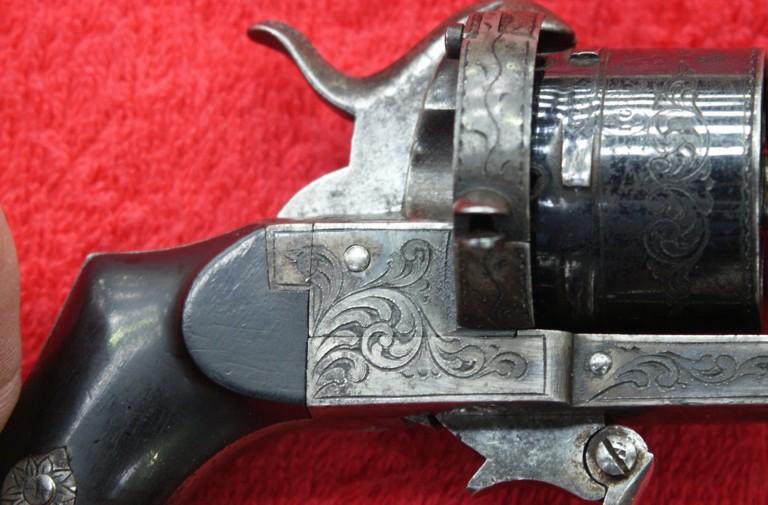
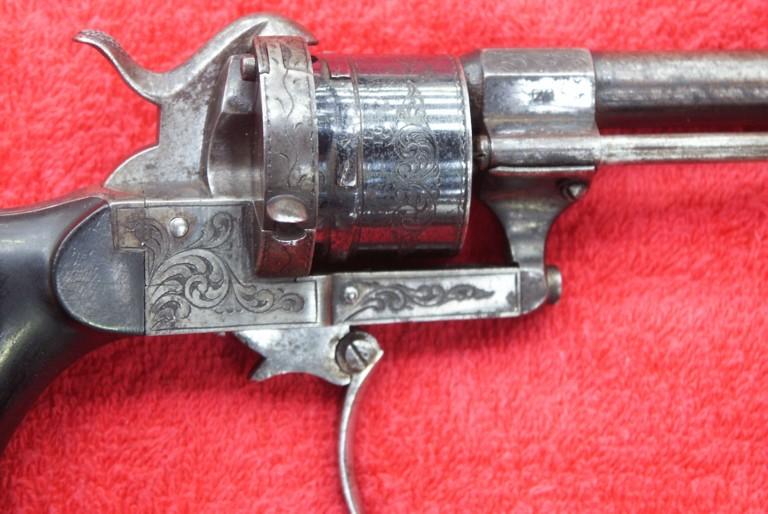
Case-hardened and hand-engraved frame, blued cylinder and barrel; hammer, trigger and screws nickel plated. Classical folding trigger.
Grip plates made of true ebony and very finely polished. Engraved grip screw and escutcheons.
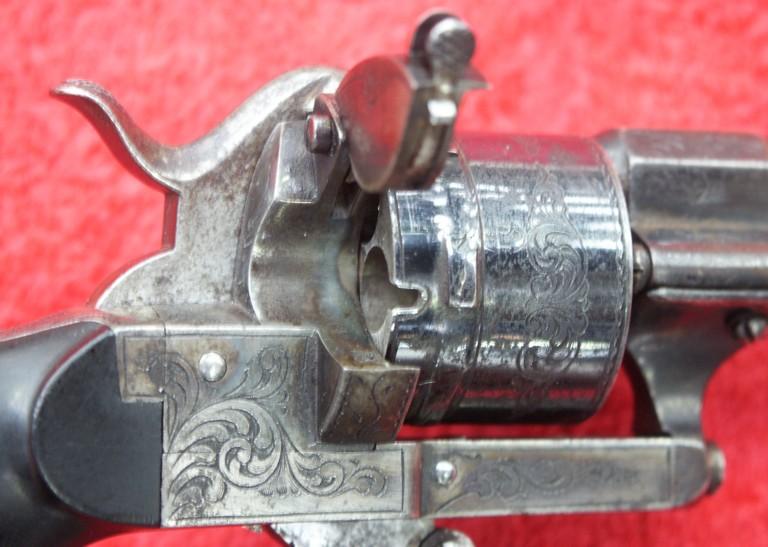
The recoil shield features a circular flat shield around the cylinder for protection of the protruding cartridge pins.
Round barrel with octagonal chamber. The barrel is rifled 5 clockwise.
Luxury finishes with perfectly adjusted components. Like all 2nd models, this weapon is at the same time a jewel and a high quality weapon.
There are no traces of rust, or pitting.
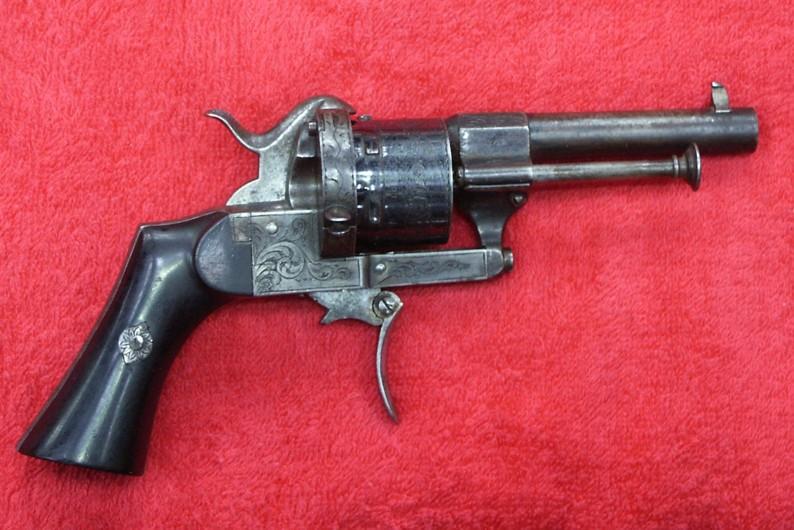
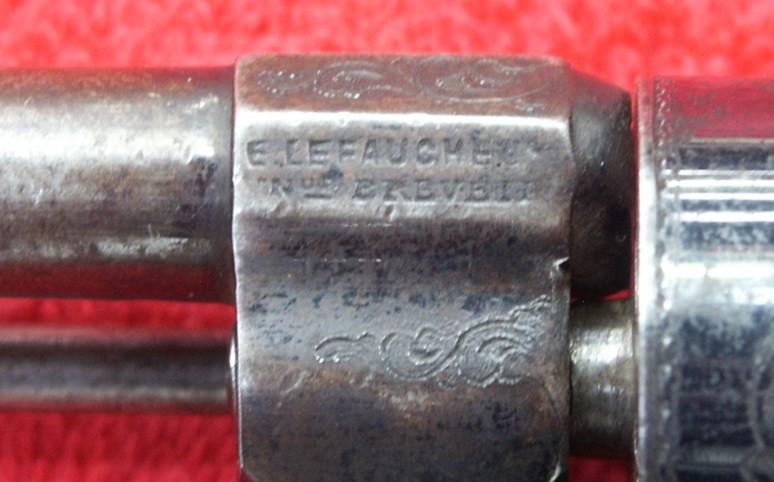
Markings:
Left side of chamber: E. LEFAUCHEUX INVon BREVETE in two lines
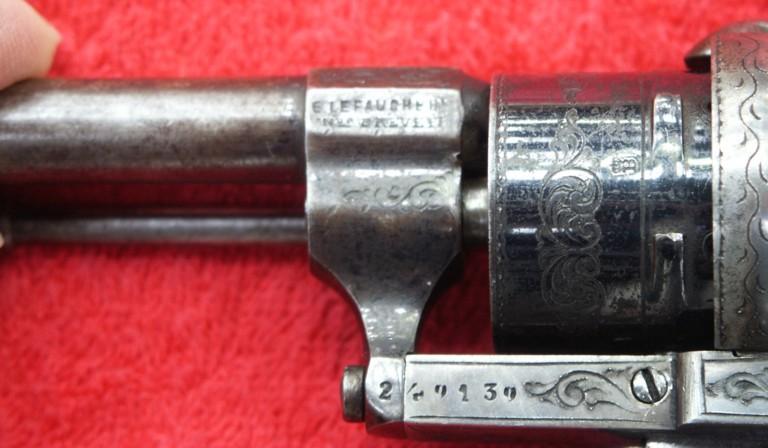
Left side of frame, under the cylinder: # 240139
Cylinder circumference: ELG* in oval and controller's initial N under crown (pre-1877 Liège proof marks)
Right side of chamber: controller's initial N under crown
Inside the grip plates the initials JM are stamped.
No other markings whatsoever.
Origin:
There are several possible origins for this gun:
1. Manufactured by Eugène Lefaucheux and sent to Liège for proof. Eugène had several of his guns proofed at Liège, because the Liège proof was the heaviest in the world in those days, so the Liège proof stamps were a guarantee of quality.
2. Manufactured by Eugène Lefaucheux and sold "in the white" to one of his Liège correspondents (Francotte, Clément, Janssen...)who finished the gun and had it proofed for sale on the Belgian market. In that case the revolver has been engraved and finished at Liège.
3. Manufactured in Liège under license of Lefaucheux, under condition of indicating his name on the weapon. The owner thinks this is the option that should be considered.
Note
Althought I don't want to debate on that point, my personal opinion is that the revolver was made in Paris. But I might be wrong.
Anyway, the number stamped on the frame is NOT a serial number. It is an identification code linked to the contract and the shop where the gun was manufactured. I have a similar revolver in my own collection that has a 67 and a dot in front of the "serial number". According to Taylerson in his book "The Revolver 1865-1888", the 67 number stands for the year of manufacture (1867).
Unfortunately the number stamped on Philippe's revolver does not allow identifying the year of manufacture; but I'm quite sure it was made in the 1860's.
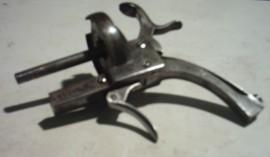
Pic 1
CLOSE EXAMINATION AND DIAGNOSTICS
It seems like the trigger return spring is broken or missing; the cylinder would revolve only when the gun is pointed at the floor, which tends to indicate that the pawl or hand spring is missing. The hammer does not hold at full cock, or at least not quite good.
I can dismantle the gun totally without any problem, all screws accept to unscrew without difficulties. I do this very carefully in order to avoid ripping and damaging the screw heads that look untouched.
Complete disassembling reveals the following problems:
- Trigger return spring and pawl spring are missing
- Hammer fullcock notch a bit worn
- The trigger lever axis is a bit loose
At first sight, the repair looks relatively simple.
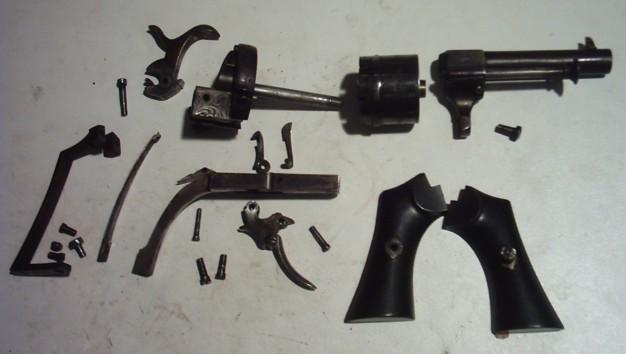
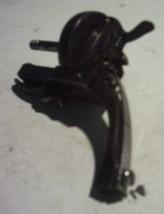
Pic 2: weapon disassembled
Note
Picture 2 shows clearly the great number of parts contained in this revolver.
Among others, following details should be noticed:
- The grip frame is not integral with the main frame, but is attached to it by two screws on top (hidden behind the grip plates) and another screw on the butt, just under the main spring. This feature is on all revolvers of the 2nd type, and reminds the similar system used on American revolvers of the Colt Navy 1851 type. The great advantage is that it makes the main spring much more accessible.
- The main frame itself is divided into two distinctive parts: the upper part contains the recoil shield, the cylinder axis and the hammer; the lower part houses the rest of the lock mechanism. Both parts are attached together by two screws that enter the frame through the bottom, at both sides of the trigger. The parts are so well adjusted that when the gun is assembled, the jointure is virtually invisible. This characteristic is found on all 2nd type revolvers, and has the same advantage of making the inner mechanism much more accessible.
The mechanism itself is quite different from the classical 3-components one in the 1st and 3rd type revolvers.
* The sear is attached to the top of the trigger block instead of the hammer. It is hook-shaped and actuates the hammer in the vertical move, upwards as well as downwards.
* The hammer bottom is curvy and has its fullcock notch at the rear instaed of the front. At the front is a square-shaped pin that engages the hook in the sear.
* The trigger lever is a separate part, located at the rear of the mechanism. It has its own spring, attached to the bottom frame.
* The pawl or hand spring is attached to the top of the pawl instead of the bottom, and actuates both the sear and the pawl. Sear and pawl have a mutual axis that holds them connected to the top of the trigger block.
* The trigger block has the classical projection at its fore end that lays on the return spring, as well as the classical protruding pin at the top, that acts as the cylinder locking cam.
* The rear part of the trigger features another projection that actuates the trigger lever when the trigger is squeezed. Some 2nd types feature a small bar instead, which has the same function.
Second type revolvers are always perfectly finished, very well adjusted internal parts, and show no tool traces. On this one, one can even see that the small cut on top of the pawl, that is meant to hold the spring in place, is actually a small separate block that is housed in the pawl head. That small block is not tempered, which allows bending for a better attachment of the spring. The pawl itself is made of tempered steel, though, which gives much better resistance to wear. Quite smart, isn't it?
WORKING
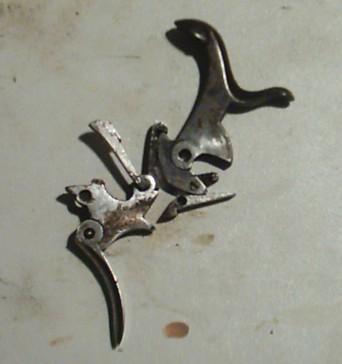
Picture 3 shows the inner lock parts in their approximate position inside the lock.
At the fore end of the trigger block one can see the axis hole, the "return projection" and, on top, the cylinder locking cam.
Right behind is a ring on which the hand and the sear are connected. Both are hold together by the perpendicular axis of the pawl (here shown still without spring).
The pawl spring is L-shaped; its lower horizontal part passes behind the sear and pushes it backwards towards the hammer.
The sear has a hook-shaped notch at its top that engages the square pin at the fore end of the hammer bottom.
At the rear of the hammer one can see the main spring connector, and right below the fullcock notch. That notch engages the corresponding one on top of the trigger lever.
The small triangular part that is behind and under the hammer is the trigger lever. It has an own axis and lays on a flat spring that is attached to the bottom frame.
It has a notch at the rear, and a small projection at the front, that is pushed upwards by the corresponding projection visible at the rear of the trigger.
Single action: the hammer is pulled at full cock with the thumb and the trigger is squeezed. When the hammer is pulled backwards, it engages the hook in the sear; the sear actuates the trigger and the pawl, to which it is connected. The hammer fullcock notch engages that of the trigger lever. When the trigger is squeezed, its rear projection pushes the trigger lever upwards; the back o the latter moves downwards and disconnects from the hammer. At the same time, the hammer disconnects from the sear and falls down to hit the cartridge pin. When the trigger is released, the sear returns down home and engages the hammer pin again as it is pushed backwards by the pawl spring.
Double action: the trigger is squeezed like on any other revolver. This time however, the hammer is pushed backwards by the lower part of the hook in the sear. The trigger pushed the trigger lever upwards again, and the hammer falls freely down. When the trigger is released, the parts return into place like above.
Triple action: the shooter squeezes the trigger slowly, until the hammer engages the trigger lever and stays at full cock. This feature allows double action shooting without disturbance of the aim. The hammer can also be thumbcocked; then the shooter can squeeze the trigger slowly, until a click is audible. At that moment, the hammer is held only by the sear. The shooter can either release it slowly if he decides not to shoot, or fire the round by simply squeezing the trigger a little bit harder. In both cases, the cylinder remains locked in position.
Allow me to say right away that fullcocking the hammer by simply squeezing the trigger requires not only a perfectly tuned mechanism, but also a sensibility in the fingers, which I don't have. I tried a dozen times, but could bring the hammer at fullcock only once.
One can also wonder about the sense of such a feature on a pocket defense weapon with an accuracy that is very questionable beyond 10 meters. In my opinion it was more a sale argument, probably efficient in an era when it was more normal to bear a gun than not.
That can be compared, for instance, with our modern cell phones: they include cameras, internet links, radio, weather reports, clocks, and some of them even allow phone calls...
CLEANING
The parts are all covered with a thin lay of dried oil mixed with dust. In order to avoid damaging the patina and the colors, I clean them simply with a soft cloth drenched with trichloroethylene. That treatment refreshes the nice brownish case-hardening colors on the frame (95%) and the shiny cold blue of the cylinder.
Unfortunately, the barrel has lost a great part of its blue, and has turned brownish. The inner parts are in the white; the hammer, trigger and screws are nickel-plated. The trichlo removes all stains without any damage.
TRIGGER RETURN SPRING
I won't go into details on this point, as I have developed it in several previous articles. As usual, I first take all dimensions of the new spring, and then I cut it from a piece of untempered spring steel coil. I fold it into the right shape, and then place it into the frame to determine the right opening. After that, I bring it to the right thickness with a file, and then I temper it hard and soften it again in oil.
However, as I am working on a triple action revolver, I need to bring the spring to the exact thickness, because that is very determinant for the proper working.
If I make it just a little too thick, I will loose both the triple and the single action functions. So I made it as thin as possible.
To temper it hard, I first heat it to a bright cherry red, and wait until the metal starts sparking to throw it in cold water.
To soften it right, I put it on a very gentle fire and let it come slowly to the dark matt blue before cooling it in oil.
I also polish the spring once terminated, because the lines left by my file are all potential breaking lines on such a thin part.
I thought that my spring would break and that I would have to try again, but I was wrong: my spring appears strong and elastic, as it should be.
PAWL SPRING
Instead of being straight and flat, the pawl spring on this revolver is L-shaped. The horizontal lower part passes behind the sear and pushes it backwards towards the hammer. So, that spring has to be strong and thin at the same time.
As I previously said, I bought once on a junk market a whole bunch of spiral coil springs, coming from various models of clocks. That material is exactly what I am going to use for the make of the spring I need.
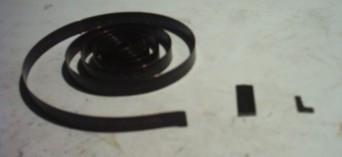
Pic 04
I took a spring of about 1 cm wide, broke a portion of it, and cut my L-shaped spring in that portion using a file (picture 04). Filing and adjusting the spring at the right dimensions (about 2 mm wide) took only about 15 minutes. I don't need at all to temper, since those thin coil springs are already tempered but are still thin enough to allow filing. We need only a good quality file.
I bent the top of my spring a little, and then I put it in place in the pawl head. After having squeezed it firmly, I added a drip of varnish, as I usually do, in order to strengthen the attachment (pictures 05 and 06).
pics 05 and 06
HAMMER FULL COCK NOTCH AND LOOSE TRIGGER LEVER
The hammer fullcock notch - and the corresponding notch in the trigger lever - are a bit worn and won't hold very well. I simply file them a bit deeper and straight using a Swiss triangular file of with very fine grain. This operation must be done carefully, in order not to weak any part nor make the notch too deep, which would jam the mechanism.
The trigger lever is a bit loose due to the axis hole that has become a bit larger by some wear; so the lever tends to turn to the left and rubs against the frame, which results in uncomfortable hardening and shocks in the trigger. Since I can't make the hole smaller, I solve the problem by filing the side of the trigger lever, so that it can't reach the frame wall anymore.
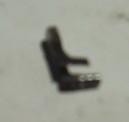
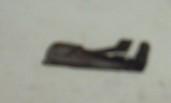
Pic 07
The picture 07 shows the lower frame, with the trigger lever, trigger block and return spring assembled.
ASSEMBLING AND TESTING
As usual, I reassemble the lock mechanism in order to check its working and timing.

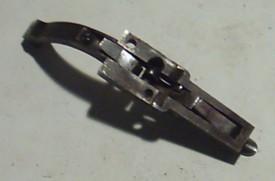
Pic 08
I start by mounting the sear and pawl (picture 08); then I assemble the upper part of the frame, placing the pawl exactly into its channel and the sear beyond the recoil shield. Its ok, they can move freely.
Pics 09 and 10
Then I assemble the hammer, engaging its fore pin into the sear hook (pictures 09 and 10). Next, I assemble the main spring and I screw all screws all the way in.
Now I can activate the mechanism and see what happens.
The hammer feels a bit too strong and does not engage the fullcock notch very well; turning back its screw one revolution is enough to bring the spring at the right tension and solve that little problem.
FINAL REASSEMBLING
Since the lock mechanism seems to work perfectly now, I don't need to disassemble it anymore. So I first reassemble the grip frame and plates, then I put the cylinder and the barrel back in place.
A last test confirms the perfect alignment and timing.
Pic 11
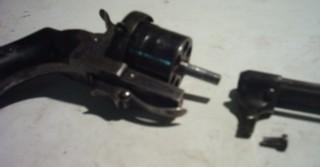
Pic 12
Pic 13
There we are the repair is done (pictures 11 to 14)
I had great pleasure repairing that very nice little weapon, and I think its owner will be satisfied.

COMPARISON
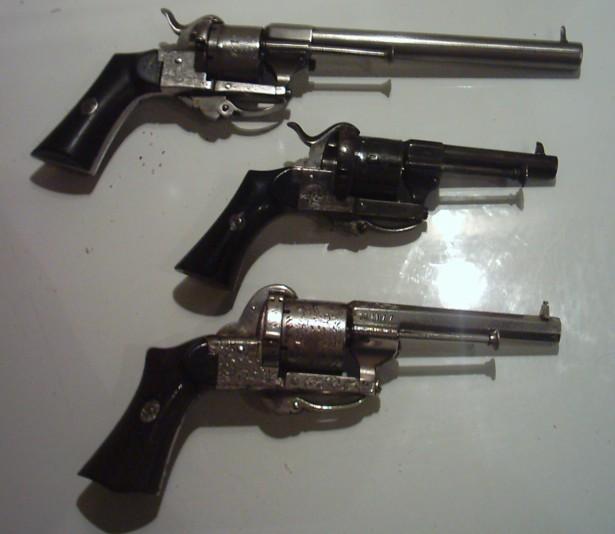
Pic 15
Picture 15 shows our patient between two other 2nd models that are in my own collection. All three are of the 7 mm pinfire caliber.
The one above, that has some target weapon attitudes with its exceptionally long and heavy barrel, has the same Lefaucheux markings as the one I just repaired, as well as the same Liège proof marks, but it also has the year 1867included in its "serial#". It is also a triple action revolver, but has a small bar instead of a fix projection at the rear of its trigger. Its internal lock mechanism is identical, though.
The one below is "double action only" and bears all the true Lefaucheux markings: E Lefaucheux Breveté, Paris on top of the barrel, the "broken pistol" logo in front of the serial #, the mention "Breveté SGDG" in an oval on the trigger block, and the Paris proof stamps. This one was definately made by Eugène.
The question about where the two others were manufactured - Liège or Paris - remains open; but anyway, those three revolvers are excellent examples of the skill of the Belgian and French gunmakers in the middle of the 19th century.
Marcel